Introduction
Interfacing the DHT11 sensor with an ESP32 microcontroller is a popular project among electronics enthusiasts and IoT developers. The DHT11 sensor is known for its simplicity and effectiveness in measuring temperature and humidity. This guide will walk you through the process of connecting and programming the DHT11 sensor with an ESP32.
What You Need
Before we dive into the technical details, let’s gather the necessary components:
- ESP32 Development Board
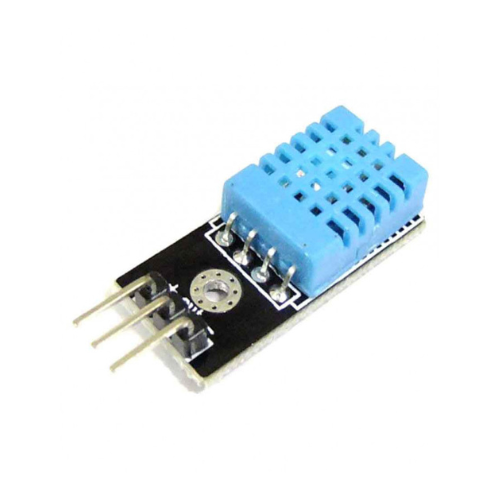
- DHT11 Temperature and Humidity Sensor
- Jumper Wires
- Breadboard (optional but recommended)
- Computer with Arduino IDE installed
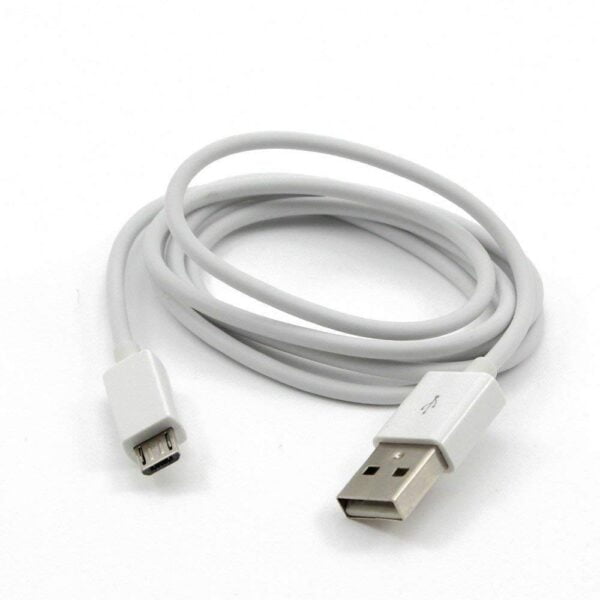
- Micro USB cable for programming the ESP32

Understanding the DHT11 Sensor
The DHT11 sensor is a basic, low-cost digital sensor for sensing temperature and humidity. It uses a capacitive humidity sensor and a thermistor to measure the surrounding air and provides a digital signal on the data pin.
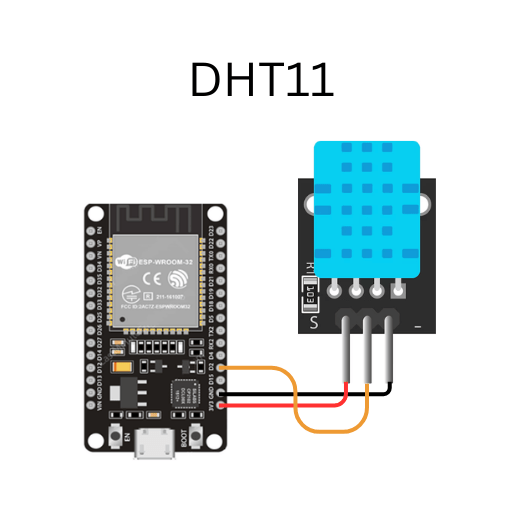
Wiring the DHT11 to the ESP32
The DHT11 sensor has four pins, but only three are used: VCC, GND, and DATA. Here’s how to connect it to the ESP32:
- VCC: Connect to the 3.3V pin of the ESP32.
- GND: Connect to a GND pin of the ESP32.
- DATA: Connect to any digital GPIO pin of the ESP32 (for this example, we’ll use GPIO 2).
Setting Up the Arduino IDE
- Install the ESP32 Board: Open Arduino IDE, go to
File > Preferences, and add the following URL to the “Additional Boards Manager URLs”:https://dl.espressif.com/dl/package_esp32_index.json. Then go toTools > Board > Boards Manager, search for “ESP32”, and install it. - Install the DHT Sensor Library: Go to
Sketch > Include Library > Manage Libraries, search for “DHT sensor library” by Adafruit, and install it.
- Install the ESP32 Board: Open Arduino IDE, go to
Writing the Code
Now, let’s write the code to read data from the DHT11 sensor and display it on the serial monitor.
#include "DHT.h"

#define DHTPIN 2      // Digital pin connected to the DHT sensor
#define DHTTYPE DHT11 // DHT 11

DHT dht(DHTPIN, DHTTYPE);

void setup() {
  Serial.begin(115200);
  dht.begin();
}

void loop() {
  // Wait a few seconds between measurements
  delay(2000);

  // Reading temperature or humidity takes about 250 milliseconds!
  float h = dht.readHumidity();
  // Read temperature as Celsius (the default)
  float t = dht.readTemperature();
  // Read temperature as Fahrenheit (isFahrenheit = true)
  float f = dht.readTemperature(true);

  // Check if any reads failed and exit early (to try again).
  if (isnan(h) || isnan(t) || isnan(f)) {
    Serial.println("Failed to read from DHT sensor!");
    return;
  }

  // Compute heat index in Fahrenheit (the default)
  float hif = dht.computeHeatIndex(f, h);
  // Compute heat index in Celsius (isFahrenheit = false)
  float hic = dht.computeHeatIndex(t, h, false);

  Serial.print("Humidity: ");
  Serial.print(h);
  Serial.print(" %\t");
  Serial.print("Temperature: ");
  Serial.print(t);
  Serial.print(" *C ");
  Serial.print(f);
  Serial.print(" *F\t");
  Serial.print("Heat index: ");
  Serial.print(hic);
  Serial.print(" *C ");
  Serial.print(hif);
  Serial.println(" *F");
}
Uploading the Code
- Connect your ESP32: Use a USB cable to connect the ESP32 to your computer.
- Select the Board and Port: Go to
Tools > Board, select your ESP32 model. Then go toTools > Portand select the correct port. - Upload the Code: Click the upload button (right arrow icon). Once uploaded, open the Serial Monitor (magnifying glass icon) and set the baud rate to 115200. You should see the temperature and humidity readings displayed.
Conclusion
Interfacing the DHT11 sensor with the ESP32 is a straightforward and rewarding project that provides valuable data for various IoT applications. Whether you’re building a weather station or a home automation system, understanding how to use these components together is a vital skill.
By following this guide, you now have a functional setup for reading temperature and humidity using the ESP32 and DHT11. Experiment further by integrating this data into cloud services, displaying it on an LCD, or triggering events based on the readings.
Happy building!
[/vc_column_text][/vc_column][/vc_row]