Introduction:
In this tutorial, we will learn how to interface a Passive Infrared (PIR) sensor with the ESP32 microcontroller. PIR sensors are widely used for motion detection and can be incorporated into various IoT projects for home automation, security systems, and more. The ESP32, with its built-in Wi-Fi and Bluetooth capabilities, provides an excellent platform for integrating PIR sensors into IoT applications.
Materials Needed:


- ESP32 development board
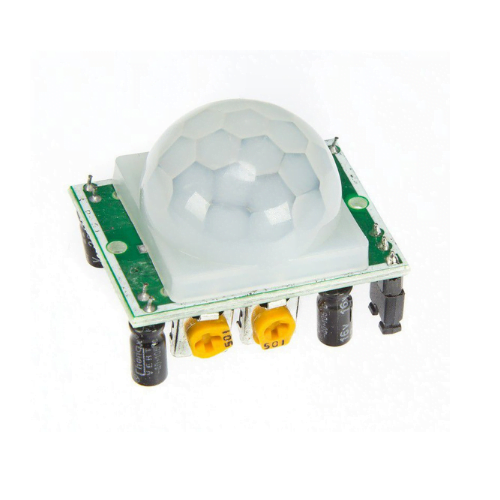
- PIR sensor
- Breadboard (optional)
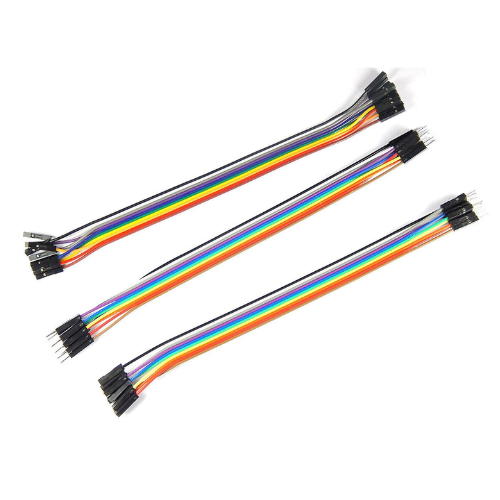
- jumper wires
- Power source (USB cable for ESP32)
- Computer with Arduino IDE installed
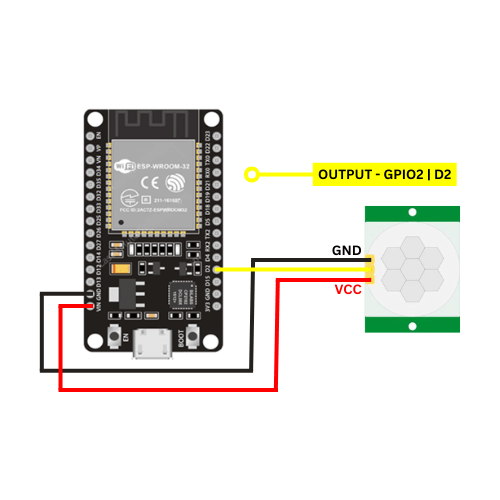
Circuit Connection:
Connect the components as follows:
- Connect the VCC pin of the PIR sensor to the 3.3V output on the ESP32.
- Connect the GND pin of the PIR sensor to the GND on the ESP32.
- Connect the OUT pin of the PIR sensor to any GPIO pin on the ESP32 (for example, GPIO 2).
Arduino IDE Setup:
Open the Arduino IDE on your computer.
Install the ESP32 board support:
- Go to File -> Preferences.
- Add the following URL to the “Additional Boards Manager URLs” field:
https://dl.espressif.com/dl/package_esp32_index.json. - Click OK.
- Go to Tools -> Board -> Boards Manager.
- Search for “esp32” and install the “esp32” board support.
Select the ESP32 board:
- Go to Tools -> Board and select your ESP32 board variant (e.g., ESP32 Dev Module).
Install the CH340G driver:
- download Windows CH340 Driver
Arduino Code:
// PIR Sensor with ESP32

const int pirPin = 2; // GPIO pin connected to the OUT pin of the PIR sensor

void setup() {
  Serial.begin(115200);
  pinMode(pirPin, INPUT);
}

void loop() {
  int pirState = digitalRead(pirPin);

  if (pirState == HIGH) {
    Serial.println("Motion detected!");
    // Add your desired actions when motion is detected
  } else {
    Serial.println("No motion");
    // Add your desired actions when no motion is detected
  }

  delay(1000); // Adjust the delay based on your project requirements
}
Explanation:
- The code initializes the PIR sensor pin and sets it as an input.
- In the
loop()function, it reads the state of the PIR sensor. If motion is detected, it prints “Motion detected!” to the serial monitor; otherwise, it prints “No motion.” - You can customize the code to perform specific actions when motion is detected or not detected.
Upload and Test:
- Connect the ESP32 to your computer using a USB cable.
- Select the correct COM port in the Arduino IDE (Tools -> Port).
- Click the “Upload” button to upload the code to the ESP32.
- Open the Serial Monitor (Tools -> Serial Monitor) to view the output.
Now, your ESP32 should detect motion using the PIR sensor, and you can further enhance the code based on your project requirements.